
 Events
Log in
Statistics
We have 474 registered usersThe newest registered user is bitaacademy
Our users have posted a total of 44655 messages in 6574 subjects
THAT’S ENTERTAINMENT
CLICK ON ANY OF THESE LINKS TO FIND OUR EXTREME ENTERTAINMENT
UPDATED :
71 WGT TUTORIALS & 32 YOUNG46 TUTORIALS
CLICK HERE TO SEE OVER 100 YOUTUBE VIDEO TUTORIALS . FROM WGTers , WGT & YOUNG46 FORUM UPDATE
TO THE MANY WELCOME GUESTS . THIS FORUM IS NO LONGER A COUNTRY CLUB WEBSITE FOR A WGT COUNTRY CLUB . PLEASE FEEL FREE TO READ THE FORUMS.
THERE ARE MANY TOPICS OF INTEREST . OR NOT . THIS WEBSITE IS AN INFORMATION AND ENTERTAINMENT WEBSITE ONLY .
MUCH OF THE CONTENT IS ARCHIVES OF PURPOSES PAST .
THERE ARE SOME MORE CURRENT TOPICS .
REGISTRATION IS NOT NECESSARY TO READ THROUGHOUT .
REGISTRATION IS EASY AND FREE . THIS IS AN AD FREE WEBSITE . NOTHING IS EVER REQUESTED FROM REGISTERED MEMBERS .
REGISTRATION ENABLES COMMENTING ON TOPICS . POSTING NEW TOPICS . FULL ACCESS TO THE WEBSITE IMAGE HOST . WHICH IS A VERY COMPLETE AND CONVENIENT TOOL .
PLEASE ENJOY .
TIER & AVERAGE REQUIREMENTS
BASIC LEVEL AND AVERAGE REQUIREMENTS , AND SATURATION

WHILE YOUR HERE
WHILE YOUR HERE :
CHECK OUT THE INCREDIBLE PHOTOGRAPHY IN
MY SERIES
THIS USED TO BE THE HOME OF OUR WORLD CLOCK . WHICH CAN NOW BE FOUND IN ITS OWN FORUM ON THE MAIN PAGE ..
THERE ARE MORE WORLD CLOCKS INSIDE HERE .
WORLD CLOCK
FB Like
Kiawah 18 Course Walk Through
Valley of the Sun Casual Club :: FORUM OF WGT GR8's :: GODELESCHER A WALK THROUGH YOU WILL NEVER FORGET
Page 1 of 1

 Kiawah 18 Course Walk Through
![]() by Paul Tue 06 Jun 2017, 6:07 pm
by Paul Tue 06 Jun 2017, 6:07 pm
Kiawah 18 Course Walk Through
17 Feb 2012 at 9:02 AM
Hole 1 - Very Birdiable Par 4
The Drive
Maybe the easiest hole on WGT, Kiawah 1 is a flat, short, low-wind dogleg right. It starts off narrow, but widens considerably. Grip it and rip it. It's hard to have a bad tee shot. Shots to the left will bounce back toward the fairway, and shots to the right are usually saved by the slight dogleg.
The Approach
Usually this is a wedge or a short iron, and it's usually just target practice. The green is open, flat, and level.
Not much to say about this hole other than, "have fun"
Hole 2 - Birdiable Par 5
The Drive
Depending on your clubs and tee box, this hole is either reachable in 2 or 3. For me, it's always 3 and I think that's probably true for most people who are correctly equipped for their tier, so that's how I'll describe this hole.
The drive should be safe if you're going for a GIR. There's no reason to flirt with the weeds that bisect this hole or the sand short of the fairway. A very common mistake is players ending up in the sand because they tried to squeeze every last inch out of their drive and they just couldn't carry it. When you consider that their second shot was still going to be a lay up, the risk seems unecessary.
Just put it in the fairway.
2nd Shot - The Lay Up
There is a landing area left of the green. By hitting a well thought out 2nd shot, you can leave yourself a nice full 50 or 60 yard wedge to the hole for an easy bird.
Those with less forethought will probably end up in that gray area between shots at around 35-40 yds. It's also likely that those who try to get as close as possible will end up in the rough or in the sand short and left of the green. So, if you're going to lay up, then lay up properly and give yourself a nice full wedge.
If your drive went into the sand, you will be tempted to make up for your mistake by trying to pull off a miracle shot that clears the second ditch further up the fairway. Don't do it! It's a low percentage shot and will most likely result in the loss of a ball. Take a short iron or wedge and put it back on the fairway like an adult. Compounding errors is the fastest way to double bogey.
3rd Shot - The Approach
From the landing area left of the green, the ideal shot is to stick a full wedge at the pin or a punched wedge that lands a few feet short and left of the pin, then rolls the last few feet down the slope toward the hole.
Anything longer than a 9 iron into this green and you're really just playing for par. It's easier to two-putt from past the hole than it is to up and down from the frontside bunker, so be long if you're going to miss.
The Green
Anything longer than a 6' putt should be considered a lag on this green. By all means, try to make your first putt, but don't let it run past the hole. The ball can quickly get away from you leaving you with the dreaded three-putt.
Hole 3 - Birdiable Par 4
The Drive
Put it in the damned fairway!
When playing AS matches and my partner has the tee shot, I always cringe on this hole. It seems so reachable that inexperienced players with long drivers always seem to get themselves in trouble here. Easy birdies become difficult pars.
Before talking about how to drive this hole, I want to talk about why going for eagle is a waste of time.
First off, you're not going to hold the green. Even if you make it past the sand, through the big tree, over the 50% rough, and onto the raised green, you're going to bounce right off the other side leaving you with a big uphill pitch or flop that's going to run. That's the best case scenario. Most likely, you'll end up in the sand or the rough and you'll have a very difficult up and down. If you want an eagle here, you have a much better chance of holing out a wedge than driver/putter.
The other unforced error on this hole is trying to tear the skin off the ball and ending up in the rough on the island in the middle of the fairway. This is a sure sign of an inexperienced player. Driving for show on this hole equals putting for bogey.
Aim for about 10-20 yds short of the island and you'll have an easy wedge shot at the pin and you've taken danger totally out of the picture.
The Approach - A running wedge.
This is a seemingly straight forward approach, but there are some hidden dangers to this shot.
At 6'-8' above you, this raised green is well defended against low trajectory shots and will cause high trajectory shots to run more than usual. Judicious use of backspin will control the roll to that of a level wedge shot, but leave you a couple yards shy.
Another thing to be careful of is the use of a punched wedge for an approach. The height of the green can cause low-flying punches to faceplant right into the side of the hill short of the green. 60 degree wedges and longer should only use full swings here.
Basically, keep your approach high and tight and you should get it close.
The landing area on this green is as close as you can get it to the hole without going left or short - Especially on tournament greens. Shots that end up left or short will have a small, but pronounced lump to deal with between the ball and the hole. No 3 footer left of this hole is a gimme, but any 8 footer right or long is makeable.
Hole 4 - A "Play-for-Par" par 4
The Drive
There are bunkers to right, but they rarely come into play. Most people just try to get as far up the fairway as possible without rolling into the rough, and that's not necessarily a bad shot.
Personally, I play center-left of the fairway to take as much of the greenside bunker out of play.
Some people intentionally go right to get closer to the green, but it's a trap. It's the only bad shot you can hit from this tee. The green looks reachable from there, but it's not really. The green is raised and the pin is so close to the front edge that even if you carry bunker, you probably won't get it to bite and you'll still have a 25' putt. If you miss, you're looking at a difficult par save.
Playing right has no upside and increased danger, stay left or center off the tee.
The Approach - You're not that good, don't do it.
Half of the green is open and reachable, the other half isn't. Going at the pin will almost certainly result in bogey. Get birdies out of your mind and you'll make par.
The left side of the green is closer to you than the pin, so club down or you'll probably run off the far side of the green. The safe shot is a high trajectory sticky iron that lands 20 feet left of the hole.
A more adventurous shot is a bump and run up the fairway that rolls onto the green, catches the slope, and trickles nearer to the hole. A good bump and run might still be 12' away, so it's up to you if you want to risk it.
If you're going to miss, miss left.
The Green
For most holes in this walk through, I don't give green advice beyond where to land your approach. This green is an exception.
Regardless of where you are on the green, your first putt is going to be a lag. The hole location is on a steep ridge that defends many four footers. If you're 20+ feet away, your goal should be getting the ball to die at the hole. If it goes in, great, you made a rare birdie; if it doesn't, you have a relatively easy tap in.
If you overshoot this putt, you're looking at the very real possibility of three putting. Being overly aggressive on this green is a mistake.
Hole 5 - Tricky Par 3
Tee Shot
This is a long iron tee shot into a green that doesn't want your ball there. The goal is to come in as high and as soft as possible. It will probably not be high enough or soft enough to stay within 5 yds of the hole, but, at that distance, it's still birdiable.
The hole is cut into the left side of a hill that runs from about 7 o'clock to about 1 o'clock from the tees. If you end up on the wrong side of the ridge, you will have a very difficult two putt. If you land left of the hole, you will have a long putt or chip back up the hill.
The ideal landing spot is near the top of the ridge just short of pin high. In a perfect world, the ball will roll down toward the hole leaving you a makeable birdie putt. In reality, it will probably keep on going past the hole half a dozen yards, but at least you'll have a makeable uphill putt.
Danger short, long, and right.
The bunker in front of the green is the worst possible lie. Avoid it, even if it means going long. From the bunker, play a full swing shot with full backspin and aim to right of the pin three or four feet. With the hole 3 feet above you and the 15-20% hard sand, hit it about 150% of the distance to the hole. (20 yard shot, hit it about like you would a 30 yard shot from a fairway lie). A flop is also an option, but you can't control the roll as well as a full swing. A pitch probably won't clear the lip of the bunker.
Hole 6 - A moderately difficult, but still birdiable Par 4
The Drive
Where you aim here depends on your club length. For most of us, it means hugging the left side of the fairway on this backward question mark-shaped hole. For those who can carry the long bunker on the left side, well, you're lucky.
Distance control is a factor here. For shorter drives, the fairway is nice and wide, but the longer your tee shot, the less wiggle room you have. Ultimately, you're fenced in by the left turn in the fairway so you're not going to get much closer than about 140 yards regardless.
If you overshoot the drive, you'll be treated to all sorts of interesting lies, like 15-20% Mulch. I don't have a good mulch shot for you, so I can't tell you how to get out of it. I can tell you that my 123 yd 9 iron only went 86 yards from the mulch when I dinged it, so my guess is you'll hate it.
The Approach
Seemingly simple, but usually not.
At about 150ish yards, it seems like you should be able to get this one close. There are two factors that usually make this less likely.
First, the wind is squirrelly on this hole. A 10 mph right to left wind might only affect your shot like a 2 mph wind. Sometimes it blows opposite what is indicated. (The 12th hole has the same variable winds). Second, the green is big undulating mess near the pin. Good shots can wander away and mishits can end up surprisingly close.
It's wise to keep your shots "tidy" on this hole. Don't let it roll too much. Don't put too much action on the ball. Don't try to be too creative.
Landing the ball right of the hole and a little bit short has the most forgiveness; the further right it is, the more it will funnel down to the hole. Left of the hole is tempting because of all that wide open green, but it's a super highway that goes right past the hole.
Hole 7 - Birdiable, (sometimes eagled), par 5
The Drive
For most golfers, regardless of tier or clubs, this hole means driving to the fat part of the fairway left of the huge bunker. For the lucky few who can carry the bunker, they will have an honest shot at eagle here.
Wind is the factor if you're on the bubble. The sand dune bunker officially takes birdie out of play.
2nd Shot - Lay up or Approach
Again, wind is a factor. With a good wind, long players can reach this green in two, but there's no guarantee they'll hold it. With the pin in back, rolling through the green and into the rough on the far side leaves a makeable pitch or chip for eagle.
If you choose to lay up, be careful. The fairway narrows down quit a bit at the landing area. As always, it's easier to get close with a full wedge than a partial power shot, so adjust accordingly.
3rd Shot - Approach or Chip
The green is fairly level, but it's very lumpy. The ball is not going to have a graceful journey to the hole on the ground, so keeping in the air as long as possible is preferable. A stuck wedge will almost certainly end up closer than a long pitch shot, even if that means hitting your wedge with only partial power.
If your third shot is a chip from the far side of the green, think of it as a lag. Chipping in for eagle is always nice, but on the off chance you don't make it, you don't want a long putt because of the aforementioned "lumpiness".
Hole 8 - A "play for a Hole-in-One - hope for par" Par 3
Tee Shot
Land it 5 yds left and about 10 yds short. If you're a good God-fearing person who goes to church on Sundays, you might get rewarded with a Hole-in-One as your golfball trickles down the slope toward the hole. If you're a heathen like me, you'll probably end up at the bottom of the hill with a hard right to left 15' putt.
When talking about how to play this hole, it's more accurate to describe the places you don't want to be most.
You definitely don't want to be long, because you'll bounce right off the backside of the dowslope and right off the green. You don't want to be short because you'll have an incredibly fast and hard breaking downhill putt that will make you look stupid in front of your friends. You definitiely don't want to attack the pin because you won't be able to stick this green unless you're teeing off with a Lawn Dart. And you definitely don't want to be right because you'll end up in Canada.
I have no real advice for this one.
Hole 9 - A long par 4 with few birdies.
The Drive
There is danger to the left and wide open fairway to the right, but if you want to reach this green in regulation, you have to hug the left side of the fairway. The ball will naturally follow the contour of the dogleg left if you have enough roll.
The Approach
This is the make or break shot on this hole. It's a mid to long iron up to a raised green that is really just a concrete slab with astroturf laid on top. If you hit the green on the fly, don't expect it to come to a stop within 30 feet of the frontside pin location.
This is either a bump and run shot or an intentionally short approach for an easy up and down from the greenside fairway.
If you play the bump and run, it's birdiable, but there is danger of running right past the hole a dozen yards, so be warned. If you lay up short of the green, you take birdie out of play, but you probably won't bogey either. The choice is yours.
HighFiv3 showed me another approach to this green that involves bouncing off the hill at the right-front of the green and trickling toward the hole (you can see a replay on his profile). It looks interesting, but, to be honest, I haven't tried it so I can't make a case for or against it. The resulting putt looks like a tricky downhill right to left-er.
Hole 10 - A dogleg left par 4, very birdiable.
The Drive
The tee shot here is key, whether you can fly the bunker on the left or lay up along side.
If you can fly the bunker, then you'll be rewarded with a nice kick forward from the downslope just past the bunker. Play for the middle of the fairway and compensate for the wind. The left side gets you closer to the hole, but can easily wind up in the rough, so play for the middle.
If you have a low trajectory driver, a little back spin will help you carry the bunker, but don't go full backspin unless you have a very strong tailwind or you might stick the ball on the fairway without benefit of the forward kick,
Carrying the bunker will leave a wedge or short iron to the hole.
If you can't carry the bunker, then lay up along side. It's still a birdiable hole, but you have to be careful not to run the ball into the rough. This hole plays a little short, even in light winds, so give yourself 10-20 yds of buffer short of the rough; you'll probably end up closer than you thought.
The Approach
The pin sits on a downslope running to the left, away from the fairway. About 10' before the pin is the top of hill. That's your landing area. Plan to land your shot on the top of that hill and about a yard right of the pin, then let it roll down toward the hole.
If winds are light, or otherwise suitable for it, you can stick the approach close, but be careful of going long or going left. Both mistakes will most likely result in a two putt or more.
If you end up in the sand left of the green, all is not lost. It's an easy up and down from there if you know the shot, but a potential disaster if you try to get creative. There's not a lot of green to work with, a lot of rough to carry, and there's a downhill right to left break, so you want as much loft as you can get.
Aim about 2' right of the pin, put full backspin on the ball (you'll be in 15-20% sand so the effect of backspin won't be great, but it will help), use a full swing with your shortest wedge, and play it just under twice the distance. In other words, if the pin is 13 yards away, hit it like a 25 yard shot from the fairway.
This is a forgiving shot. If you mishit, you will still end up with a makeable par putt. If you try to flop or pitch your way out of the sand, you will most likely get hung up in the rough short of the green or rolling a dozen yards past the hole.
Hole 11 - Very birdiable, but mostly unreachable par 5
The Drive
It's not the distance that makes this par 5 unreachable in 2, but the raised green that prevents the bump and run and sends landed shots rolling off the other end. I'm not saying at can't be reached in two, it's just a low percentage shot for most people regardless of club length.
If you accept the you're not going to reach the green in two and plan to lay up, your chances of birdie increase dramatically. For that reason, a big booming drive is largely wasted on this par 5 since you'll be clubbing down to an iron for your second shot.
The primary function of this drive is to give you an easy second shot, so play for the smack dab middle of the fairway. If you mishit, you'll still be OK. From the Master/TM tees, you should aim for about 250 yds out. For some, this means clubbing down to a 3W off the tee. A lot of people can't bring themselves not to use driver on a par 5, but seriously, it's just added risk with little benefit.
2nd Shot - the lay up
This is not a glamour shot. You won't hear crowds cheering when you nail it. You won't get everyone else in your foursome clamoring to tell you "vns", but it is still the most important shot on this hole.
You want the second shot to end up 1 full wedge shot away from the pin. This will probably put you in the neighborhood of "Bunker Hill" (my own name for it), a small, but perfectly annoying volcano of a bunker right in your path.
Bunker Hill is not as much of a danger as it appears. If you were aiming for it, you'd probably miss it. The surrounding hill has no rough and it effectively bounces shots back onto the flat fairway. Keep it in mind and play around it, but don't woory too much about it. Even mishits will probably be safe.
The main danger to your second shot is distance control. Play your lay up about 5-10 yds shorter than where you want to end up. The fairway is downhill and slopes away from you, so your 2nd shot is going to both fly and run more than you think.
What you don't want is to end up in the 25-35 yd range from the pin. This requires a partial power wedge or a harder to control flop. A full wedge shot is much easier to get close. For me, that's between 50-60 yds.
3rd Shot - The Approach
Because this is a raised green, your wedge shot will land shorter and at a shallower angle than a level shot, this means it's going to run a little more than normal. At 60 yds away, the elevation change won't affect the shot very much, but at 25 yds away, it becomes a major factor.
Ideally, you don't want to have to put any action on the ball, and if you've done everything right, you shouldn't have to. Just aim and hit it. A short wedge should stick very close to the pin. If you want to increase the likelihood of holing out the approach, club up and punch it. That will give you a little more roll to the hole. Just remember to land it a few yards short.
Hole 12 - A Long Birdiable Par 4
The Drive
While there is a lot of room to miss on this drive, that doesn't mean you should throw caution to the wind. For a good look at the pin on your approach shot, you want to be on the left side of the fairway off the tee.
There are bunkers to the left that you need to be careful of, other than that, there's not much danger off the tee. There is a canal that runs the length of the hole on the right, but a drive would have to be seriously wayward for that to come into play.
Longer drivers can bypass the bunkers altogether and they will be rewarded with a sloping bank along the left side of the fairway that will funnel their drives back to the middle if they pull their tee shot a bit. This is welcome relief for the big hitters because the fairway narrows down considerably as you move ahead
The Approach - ding it!
As I mentioned on Hole 6, the winds seem to get squirrely on this hole. By "squirrely", I'm referring to the direction when faced with light wind. Light winds are light winds and they're going to keep being light winds, but a dinged shot that you might expect to go left a yard or two might end up on the right side of the pin. I have a theory about this, and if you'll bear with me, I'll explain.
Many golfers at WGT accuse the game of having bugs and biases where the wind is concerned. Bugs? Maybe. Biases? No. Still, I don't think the wind variability on this hole is a bug. I think the winds at the Kiawah Golf Resort in South Carolina probably are squirrely, and I think it's because of the proximity of the water.
On every golf course on Earth, because of topographical features, the wind you feel at the tee may not be the same wind that's felt at, (or on the way to), the green. Hills create wind tunnels, oceans have breezes, forests block low winds, etc.
At the tee, there is a large body of water to your immediate left. At the green, there is another large body of water to your right. Water heats and cools at a different rate than the air and, as a result, creates updrafts and downdrafts depending on whether it is warmer than the air or cooler. An updraft sucks the surrounding air toward it. A downdraft pushes the surrounding air away from it.
I believe that it is this phenomenon that creates the variable winds on this hole in real life and I believe that WGT has factored this variability into its program. If I'm wrong, so be it, but regardless, it's good practice to compensate for the wind a little less on this hole than you normally would.
Back to the approach shot now.
Water right, a bunker that doesn't really come into play on the left and a million feet of green in front of the back pin location.
The green is fairly flat so a well played bump and run has a higher than normal chance of hitting this flagstick. I avoid trying to stick this shot for two reasons. First, it's usually a mid to long iron approach for me and I don't want a mishit to wander to far off the reservation so I limit my backspin just enough to control the roll. Second, if the wind is manageable, I firmly believe I can eagle this approach. (I haven't yet, but I've come close countless times), and for that, I need the ball to roll forward.
Ultimately, there are no real secrets to this hole. It's just a test of accuracy.
Hole 13 - A Birdiable (and bogeyable) par 4
I mentioned earlier in this walk through that this was written with the average player in mind who is equipped with clubs that are appropriate for his or her tier. For that reason, I've mostly been writing in generalities, regardless of tee box locations. This hole is an exception.
For players between Pro and Tour Master, this hole plays completely different than it does for Legends. The Legend tee is 102 yards longer than the next closest. Amateurs with starter clubs will face some of the same obstacles as Legends.
The Drive
For Legends and Amateurs, the water is not much of a concern on this hole. A much bigger issue is the bunkers they'll be trying to skirt. My advice to legends (and this comes only from playing the legend tees in practice with a crappy driver) is to miss center-right. Errant drives may get hung up in the 20% first cut on the right, but it would have to be pretty bad to find the water. Judicious backspin will protect you from running into the rough on the left, if necessary.
For all others, the bunkers are generally flown by 20-50 yards. For these drives, water becomes more of an issue because the fairway narrows down quite a bit in the landing area. You can choose to tee off with a 3W to take water out of play or you can nut your driver and be hitting a wedge or short iron into this green. The choice is yours.
The Approach
The water to the right of this green is a mirage. It's not there. It won't come into play unless you sneeze in the middle of your swing. Still, 80% of the time (this is not an exaggeration), myself included, the approach will end up on the left side of this pin which is on the left side of the green. I'm pretty sure this is the effect of subconciously avoiding the water.
The left side of the pin is the absolute worst place to be. The putt is super fast and it breaks like a union worker. I have seen literally hundreds of missed 8' putts from the left side of the pin and maybe a dozen birdies. Don't go left.
On the flip side, you don't have to be very close to have a makeable birdie putt from the right side of the pin. From the right, the putts are uphill and mostly flat. The main reason for missing these putts is usually lack of power. This is not a lag situation, get the ball to the hole and it can drop.
Hole 14 - An Uncomplicated but Challenging Par 3
It's a hill with the top sawn off. Drainage on this green is front right so there's a bit of dip in that corner and you can use that to your advantage. From the tee with a strong tailwind, it can be hard to get the ball to stop rolling. You can play for the slight incline on the backside of the drainage to help kill the roll. You might not birdie, but you won't have a terribly hard two putt either.
For more accommodating winds or with more responsive equipment, you can attack the pin. You'll probably be using a long iron, or maybe a hybrid, so plan for some roll.
The green does have a slight left to right camber to it so plan on landing the ball short and a little left. The ideal wind for this hole is lightly in your face and a little left to right. The ball just seems drawn to the hole without much risk of anything else happening.
The danger of this hole is that will punish mishits and bad shot decisions by falling off the green, making for tough up and downs. If you find yourself in this position, you have to know how to deal with pitching and flopping from below the hole. Generally, it won't fly as far, and because the ball is reaching Earth at a flatter trajectory than a regular pitch or flop, it has much more forward momentum. It's going to roll out. A lot.
The normal result for one of these pitch shots falls into two groups: Group A) never made it to the green and got hung up near the fringe, or Group B) Hit the green and rolled 15' past the hole.
For that reason, don't use a pitch if you're more than 3' or 4' below the hole. A flop, (or even a partial power full swing if you're more than 8' below) will give you much more stopping power.
Hole 15 - A Deceptive Par 4
The Drive - Aim Left
There are a couple of counterintuitive factors that make this hole more challenging than it needs to be. When you look at the inset image of this hole, it looks like you want to be on the right side of this fairway to get a better look at the pin. Actually, the opposite is true for a couple of different reasons.
First, the fairway has a high bank on the left side that bounces balls toward the middle. You can get some extra yardage on your drive by hitting the bank and letting it roll down the hill to the right. For the same reason, drives that hug the right side of the fairway will bounce right and often end up in the 30% rough at the knee of the dogleg.
Second, being on the right puts you below the hole. Now, if you're reading this as you're playing, you may notice that being on the right says you are somewhere around level with the hole, and you may further think I'm full of crap, but I assure you, you are below the hole. Which brings us to...
The Approach - Aim Long
This hole plays about 1-2% longer than the yardage. You are much more likely to be short than long here. The green is also on an up-slope which is going to mute any roll you might have expected.
As a rule, add a couple of yards to a wedge and then trust it to be correct. This hole is an easy birdie if you play left from the tee and long from the fairway.
Hole 16 - A long Par 5
For me personally, this is one of the harder par 5s at WGT. Properly managed or not, It's challenging from start to finish.
The Drive - Be Right
A long strech of bunker lines the left side of the fairway. The fairway itself is bisected into an upper terrace on the right side and a lower section on the left. You want to be on the upper section. As you move up in tiers, you will find this increasingly difficult to do as the tee boxes move further and further to the left of the fairway to where you feel like you're driving onto a fairway that perpendicular to you.
Drives that are short will find the face of the incline between the two halves of the fairway, effectively shortening the drive. Shots that reach the upper section will be rewarded with a little extra roll. If you land in the sand, you're probably playing for par.
2nd Shot - Carry the Bunker
This shot looks more intimidating than it actually is. The fairway in the landing area for this shot is below you anywhere from 2' to 6', this means you're going to get a little more carry anyway. If you add some backspin to your 3W, it will fly higher and land softer. With a 230 yd 3W and no wind, you can expect it to fly about 215-220. Just make sure you're landing on grass and not sand.
3rd Shot - The Approach
Here's the trick part. Generally you'll have a wedge or short iron into this green. If you hit your first two shots well, the pin should be 3'-6' above you from about 90 yds away. The green slopes up and away from you. So with the uphill shot into an up slope, expect this hole to play longer than the yardage (more than on the 15th).
The front half of the green runs right to left and the back half of the green runs left to right so factor that into your approach, though the pin placement on the front half is mostly just uphill.
Hole 17 - The Water Hole - Par 3
The Tee Shot
Miss left.
Yes. There are bunkers fore and aft of the left side. There's a big hump on the green 15' short of the flag. There's another hump 20' past the flag. The rough is thick and deep between the bunkers, and of course there's water right, but with all that danger, there is still a good sized landing area on this green with a decent chance at birdie.
My advice is play for the ace. The safest part of the green is right where the flag is. I'm not saying that to be a smart ass, I'm serious. Even if the pin were somewhere else, I would still try to aim for the same spot.
Being afraid of the water is healthy, but being too afraid of it gets people in other troubles. Ignore the water and you'll get a lot more birdies here.
Hole 18 - A Long Boring Par 4, meh...
The Drive - Let the Big Dog Eat
I hate this hole. It's featureless to me. Drive it as long as you can along the left-center fairway and you'll be safe. Mishits left are usually bounced back into the fairway anyway. Playing to the right side will squeeze out a few more yards, but it brings rough and a couple bunkers into play. The extra 5 yards closer to hole isn't a big enough benefit to play a riskier shot. Either way, you'll still be hitting a mid to long iron into this green, and if you do it from the right side, you'll be hitting uphill.
The Approach - Stick this Pin
A good approach here is one that flies 90% of the green and stops like a dart. Landing in the rough to the left of the green is OK here if you have a decent short game.
If you don't have the equipment or golfballs to stop a long iron, you can cheat by aiming for the rough just off of the green. The pitch from there is entirely makeable for birdie, but if you miss, you should have an easy putt.
Laying up and playing center of the green in hopes of two-putting from 20'-40' away is a mistake. The green slopes away, so your shot is probably going to run off the far side, but even if it doesn't, there are no easy putts from that distance on this green.
The best option here is to be aggressive.
Paul
Please enjoy
_________________
May the SUN always be with you
home of
https://www.valleyofthesuncc.com/ an information and entertainment only website

Paul- Admin

- Posts : 42036
Join date : 2013-05-06 -


» Bethpage Black 18 - Course Walk Through
» WALK WITH ELIAS AND OTHER WWE INTRO's
» Royal St. George's Course Walk-Through
» Congressional CC Course Walk Through Front 9
» Congressional CC Course Walk Through Back 9
» WALK WITH ELIAS AND OTHER WWE INTRO's
» Royal St. George's Course Walk-Through
» Congressional CC Course Walk Through Front 9
» Congressional CC Course Walk Through Back 9
Valley of the Sun Casual Club :: FORUM OF WGT GR8's :: GODELESCHER A WALK THROUGH YOU WILL NEVER FORGET
Page 1 of 1
Permissions in this forum:
You cannot reply to topics in this forum


» THE FUCK THREAD
» GET OUT THE MAP...3
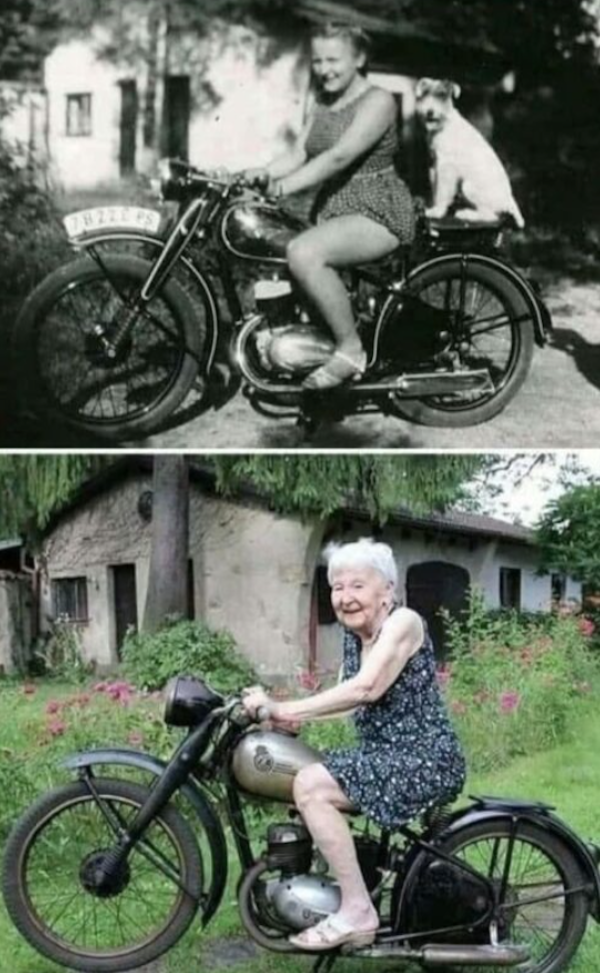
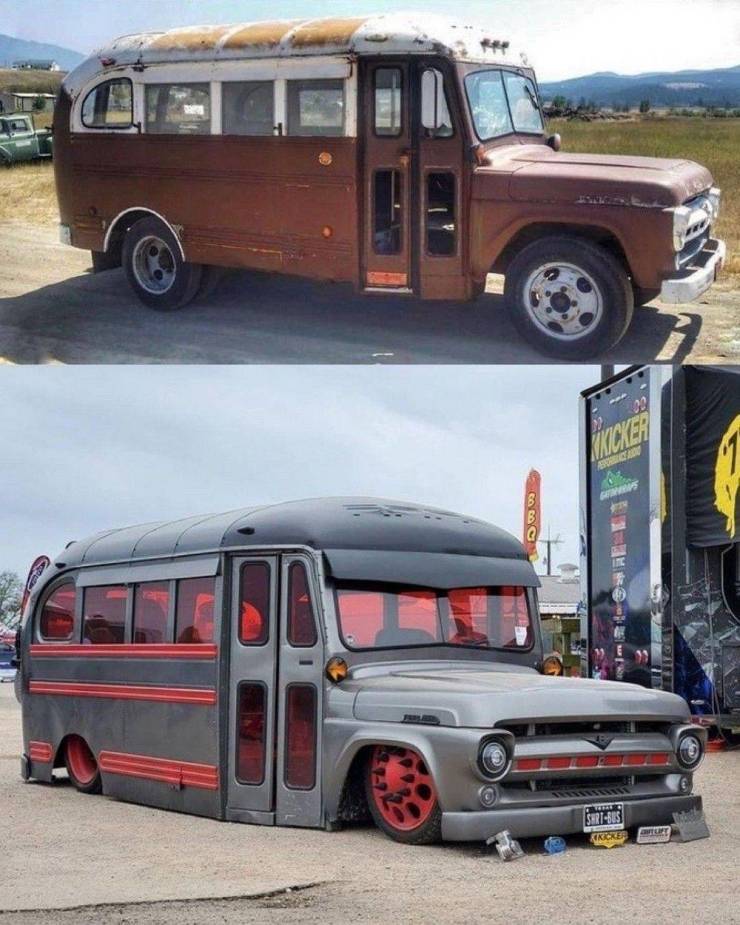
» BEFORE & AFTER...2
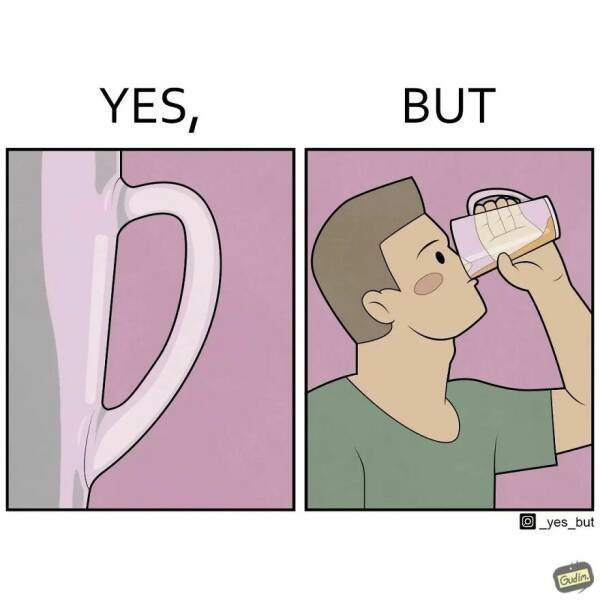
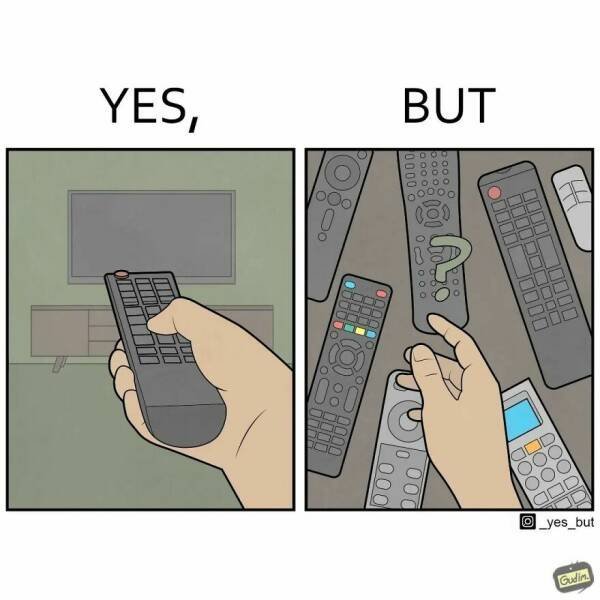
» YES,.....BUT...2
» *POPULAR CONTENTS* Valley of the SUN Official Newsletter
» WORD DAILY Word of the Day: * Dada *
» Word Genius Word of the day * recherché *
» QUIZ TREAT QUIZ * What candy bar is famously called "the great American chocolate bar"? *
» QUIZ TREAT ANSWER PAGE
» APRIL NATIONAL CELEBRATION DAYS APRIL 30 2024
» NEW GUEST COUNTER
» APRIL NATIONAL CELEBRATION DAYS APRIL 29 2024
» HISTORY FACTS * Why don't we drink these anymore? *
» AWESOME SPORTS GIF's...7